Home Photo Tutorials Video Tutorials Gallery Creative Resume Permissions Email Me

Faux Metal Tutorial

This was so much fun!!! My page titled The Journey (above this tut) features this faux metal. Here are the supplies you'll need...

Read More

Crepe Paper Carnations

How much do I love thee? Let me count the ways!! Isn't this flower adorable!? I ran across this tutorial on the web months ago and it has been rolling around my head ever since. It is so versatile making it perfect for every one one of your gorgeous creations. Let's go!

Read More

Calla Lily

I fell in love with this flower when I saw a video for it on the Heartfelt Creations website. So, if you don't want to read my tutorial you can click here to watch it over at HC. I did distress this up a little bit, which is not on the video. All right! Let's get started......

Read More

Faux Leather Tutorial

Making faux leather is easier than you think. I know, I say that about a lot of my tutorials. Have I been wrong? LOL...

Read More

Snowy Poinsettia

These flowers are just too cute! They are beyond easy to make too...BONUS!

Read More

Emerging Color Stamping Technique

Ok, I'll admit it...I really love stamping and the more I stamp the more I want to stamp. It's a wonderfully vicious circle. Emerging Color is one of those techniques that have some very basic and constant elements to it, but the creative license is all yours in how you present it. I'm sure if you Google or YouTube you will find a ton of tutorials and a lot of them will be very similar. Emerging Color boils down to this one word: resist. This is at its very core a resist technique. The whole trick to doing this is to remember that you will work in layers.

Read More


Showing posts with label Bo Bunny. Show all posts

Thursday, January 12, 2012

Swirlydoos January Kit Reveal and Blog Hop

Happy New Year and Welcome to Swirlydoos January Kit Reveal Blog Hop BLOCK PARTY!!! 

If you came here from Petaloo's blog, then you are on the right track.  If not, go back to Swirlydoos' blog and start from there.  We have some amazing projects for you to see today and as a bonus we have 4 manufacturer blogs that are joining in the fun!! There are 5 prize packs up for grabs so make sure to follow along and have fun!!?

Introducing, Mystical Winter. 

I based this page on the sketch that came with the kit.  The photo is one I took during our Halloween photo shoot at camp.  I brought it into Photoshop and applied an MCP action to it.  I really LOVE how it looks IRL.  The other two photos I found by searching for copyright free winter images on Bing.

I added this piece of Dusty Attic from my stash.  Between all of the add-on kits, we received 3 bottles of Tattered Angels mist.  I used two of them on this frame and then roughed up the inside edges with my rasp tool.  I stamped off the edge on the one side and then used bronze embossing powder around the outside edges.  I added gesso to the Petaloo Berry Branch to give it a wintery look.  I also misted, then heat embossed with silver, the Prima Roses.


This is a photo of my little Wonderland Cutie when she was just 2 years old. Awww.  This page is the beginning of my Hide & Peek Series over at Swirlydoos!

I used my Tattered Florals and Leaves die to create these whimsical blooms and leaves. I used some of the bling from our Bling Me Baby kit to dress up my blooms.  We received a strand of pom-pom string (I don't know how else to describe it LOL) and I decided to cut it into pieces and add it to my flower cluster.


I used a chipboard shape from a mini book as a template for my card stock. I dry embossed it, then heat embossed it with bronze in some places and finally used some gold ink to highlight other areas.  I punched 2 holes along the edge and then threaded ribbon through it.  Notice the metal photo corner there on the edge.  Wellll, pull it toward you and this is what you get.....


Sometimes I have a series of photos that were taken at the same time and I may not want them to be front and center, but I still like them.  Soooooo, I decided to make a mini book on my page.  Close it back up and no one knows!  Hide and Peek!


I am hosting this month's SwirlyHues Blog Challenge at Swirlydoos.  This is my example page for our color challenge.  This is my kiddo at her 5th birthday party.  That was 5 years ago this month.  *sniff...someone please pass a tissue* We went to a Nature Preserve which is literally a stone's throw away from home.  It was so cold that day.  The camp counselor walked the kids down to a frozen beaver damn.  It was beautiful; frozen in time and all glittery in the sun.  The counselor showed the kids what the logs look like when the beavers chew them and then showed the kids how they could do it too.....on pretzel sticks!  LOL  It was really cute.


I made this flower, and the two other blue ones, using the stamp set that came in our kit!


 I used bling from our Bling Me add on to embellish this piece of Dusty Attic.  I also used two different embossing powders on it.  The large white snowflake was made using the stamp set from the main kit and gesso that came in our technique kit! Voila! 


You have until midnight, eastern time, on January 15th to complete the hop. In order to qualify to win here is what you need to do:
1: Visit all of the blogs and leave a comment on each. This way we know you were there. Become a follower if you're not already. Take your time. There are beautiful things to see along the way.
2: Before you leave each blog, look for the “special” words and write it down.
Once you have visited all the blogs and collected all the special words, they will create a sentence.
3: Finally, go back here to the Swirlydoos blog and leave a comment letting us know how much fun you had AND tell us the sentence that was created with all of the special words you collected.

My special word is : "they"

THANK YOU SOOOOO MUCH FOR VISITING ME TODAY!!!! XOXOXO, Lisa

The party continues over at Prima's blog.  Have fun!

Tuesday, June 7, 2011

Swirlydoos June Reveal - Through The Looking Glass

What a kit we received this month! O.M.G!  The main kit was stuffed with so many extras this month; the embellishment add-on is outrageous, the flowers are off-the-hook and the technique add on contained LaBlanche stamps and paper and.....holy cow!  So many things and not enough room to mention them.  The paper in this month's kit includes Bo Bunny's Timepiece and My Mind's Eye Stella Rose.  We have subscribers that request a more "manly" kit every now and then and I think this kit fits that bill.  For me though, it took on more of an Americana feel.

This page includes a photo of my DD at the fair a few years back.  She was hugging a Living Statue.  These performers are pretty incredible; not only do they act like statues but they really do look like a statue.  The look on the performer's face in the photo is one of contentment with a Mona Lisa smile.  If you could see this up close and in person, it would tug at your heart strings....trust me.  I LOVE the script paper from My Mind's Eye!!!  I found myself wanting to hoard it. :)  It is kind of hard to see, but I tore the script paper horizontally and then I actually burned it...using a real flame!  I love the look of burnt paper. 

I handmade the pink flowers using some of the card stock that came in the kit.  BTW, the card stock was yellow.  I will be teaching this flower technique at Miss Art's Papercrafting School in July!

 I love this box!  In the embellishment kit we received some kraft glassine paper (Tim Holtz), along with some of his metal ink pen tips, mini light bulbs, a mini pocket watch, some keys....a lot of stuff!  I knew instantly that I wanted to take that $1 box I bought at my LSS and alter it.  The only items not from this month's kit are the metal feet, the key hole, and the material needed to make the big pink-ish flower.  It reminds me of a Revolutionary War chest.

After I covered the box in paper, I used one of the stamps that came in the main kit (a burlap-texture) and stamped all over the paper.  Then, I took a stencil from the embellishment kit and added some clock faces and numbers all over the box.  I took the chain that came in the add on kit and draped it around the box top.


 I tore one of the kit papers that has a map on it and added it to the top.  I crinkled and cut down the glassine paper to make that mini envelope.  I used Pearl Fixative Alcohol Ink to color the heart on the key and glued the other pieces down.  I made the large flower (another one that I will be teaching at Miss Art's in July).  Isn't that big blue ribbon awesome!!

This is for this month's sketch.  The photos are of my DH and he made me promise not to add too many flowers and NO butterflies to his page.  LOL!!  It is still killing me not to add butterflies on this page.  But....a promise is a promise *said through my gritted teeth* LOL
 I decided to double mat the photos and try to make some old photo corners by ripping some paper by hand.  I used the dark blue Stickles that came in the kit to dress up the corners.  I really love the Paper Rosette Sizzix die.  I decided to make my own ticket and added it to the top of the flower.


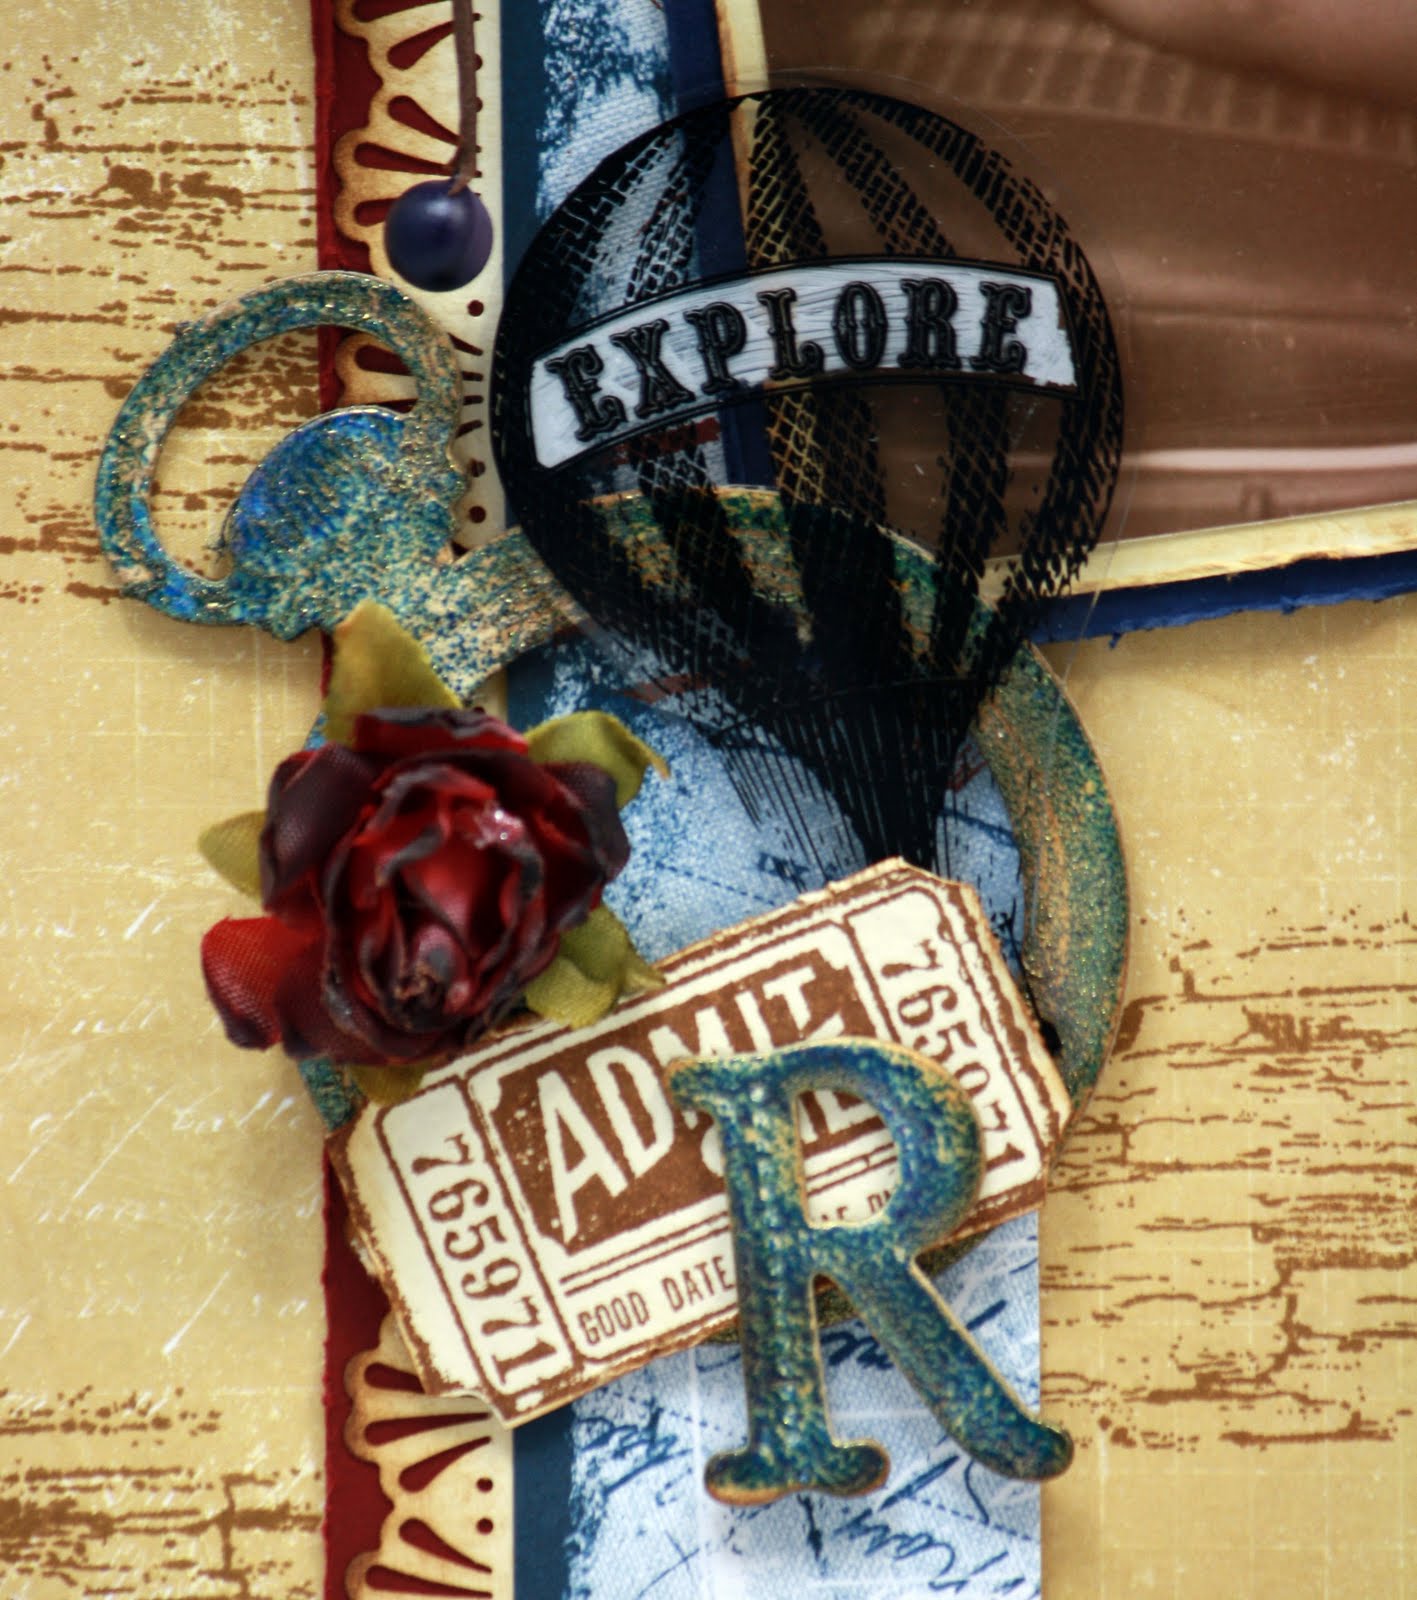
 We received some Tattered Angels Glimmer Glass in the kit too.  I took some white Staz On ink and colored in the word on the balloon so that it would stand out.  I took apart the chipboard watch with the "R" in it and I used some Lindy's Stamp Gang embossing powder.  These powders are too cool!  Just like her mists, these embossing powders are two-toned when they melt.  This one has blue and gold.

 This page is a bit different for me.  I decided that a high contrast b&w photo would look really good with these papers.  I off set the mat behind it and used another stamp that came in the main kit to create a border around my black card stock.


 I used a Spellbinders Heart die and then dry brushed some white paint across it to highlight the embossing.  I layered it over a piece of Gimmer Glass. 


 We received a very cool transparency sheet from Kanban.  It had embossed and glittered shapes all over it.  I fussy cut out one of the shapes and created a flower out of it.  I placed a gorgeous red rose in the center.

Phew!  I got a lot of mileage out of this kit and created some very different looking projects.   I hope you were inspired by something I created from this month's kit.  Thank you so very much for stopping by.  I appreciate your support!
XO, Lisa

Friday, April 15, 2011

Week 2 Round Robin

It's reveal day for week 2 of the Round Robin Challenge at Swirlydoos.  Pat created week 1's page that I had to lift.  I was really inspired by the elements that she used on her page; she used ribbon lacing, punch work and a small cluster of 2 items around her photo.  Her photo was of an artisian spring on her property.  Well, I made sure to include those elements on my page, but I completely changed where they ended up on the page.  Sometimes I just start working on a page and it has a way of taking on a life of its own, and this was one of those times.  I used up the final full sheets of paper from our April Kit.  These papers are from Bo Bunny's Gabrielle Line.....it is really, really nice paper.....*hint hint*
This is a picture of my DD when she was 4.  We have a brook on our property and it runs right next to our house. Our patio goes right up next to it.  She was playing in the water and as you can see, the mud too.  She looked so cute with that little stripe of mud under her eye.

I have always wanted to try ribbon lacing and got so excited when I saw Pat's page.  I really wanted the lacing to be functional on my page and immediately pictured the paper being folded back as if it weren't laced all the way; giving the illusion that the rest of my page was in a pocket of sorts.  I used all of my eyelets on this page but I really like the way they set off the lacing. 

Pat had a second photo on her page.  I took a photo of some tulips that were in bloom in my yard and sandwiched it in between a bird and a small tag.


I decided to use this gorgeous Dusty Attic frame for my photo rather than matting it.  I painted it white and then using a fan paint brush and Stream Alcohol ink, I created the striations along the length of the chipboard.  I went over it with a light coat of glossy accents and then embellished it with pearls.


Thanks so much for stopping by!!!!
Have a great day and Happy Spring!


XO,
Lisa

Tuesday, April 5, 2011

Swirlydoos Reveal - Bella Volo

Each month I am forever amazed by our kits at Swirlydoos.  Krissy knows how to treat us right; from the Main Kit right through each Add-On Kit, they build on one another until you end up with EVERYTHING you could possibly need to create some outstanding pages.  This month's kit features Bo Bunny's gorgeous Gabrielle line, flowers from Petaloo and Prima, Dusty Attic, bling, metal embellies, glitter and Smooch OH MY!!!!!

This is a photo of my DD and DH while we were at the Outer Banks a few years ago.  I've been wanting to scrap this for a while.  I created the book cover using the card stock we received. I used the small Prima stamp with text on it that came in the kit along with another small stamp by Prima that has branches on it. I then distressed the cover and finished it off with Vintage Photo ink.  The edge around the window has some Vintage Photo ink and Distress Embossing Powder.  I inked the Dusty Attic hinges and then used a glue pad and the small Prima text stamp.  Then I dusted some gold Perfect Pearls over the stamped image and finished them off with Liquid Pearls that, you guessed it....came in the kit!  I painted the thickers white and then dusted them with the white Fairy Dust Glitter we received.  


This is another photo I took while we were at the beach in the Outer Banks.  My DD was spinning, twirling and dancing as the waves were coming up onto the sand.  I made the flowers out of the card stock and a stamp from Heartfelt Creations.  I used the coordinating Spellbinders Die set and cut them out.  I inked them up a little more and then edged them in Fairy Dust glitter.  Those little Petaloo flowers fit just perfectly with them. 
Our Technique Kit this month is called Chipboard Palooza and not only does it include some gorgeous Dust Attic, but it also includes a white Adirondack Paint Dabber, Copper Alcohol Ink, Smooch Paint, Glitter and lots of little pearls.  

I painted the Dusty Attic gate with the white paint.  Then I went over some areas with the Copper AI, and a few other places using the green Smooch paint.  I finished it off by adding some Distress Embossing powder. A very cool thing happens when you emboss over paint; the heat makes the paint bubble and in the places where your embossing is sparse the paint will actually come to the surface and give you this really cool oxidized appearance.  I decided to embellish it  further by taking apart a cameo broach that came in the kit, and used the pearls and one of the jewels. I embossed a transparency with Ranger Bridal Embossing Tinsel and placed it behind the gate.


This is such a fun photo.  I remember the day I took it.  They don't look like they are up to anything do they? Right......... This is my DD and her cousin.  This paper is the perfect fit for outdoor photos.  I decided to use the same flower stamp and die I used on the page above, but made the flowers a bit more simple.  I inked them up a bit with some Broken China and also painted them using a Magical Mica that we got in the Embellishment Add-On.  Aren't the leaves awesome!  This is another stamp from Heartfelt Creations and again, there is a matching die.  After I stamped and cut them out, I sprayed them with some green Glimmer Mist and crumbled them up while they were still wet.  I hit the wrinkles with Pine Needle distress ink and then edged them using Vintage Photo.  I used a Fantastix and Pine Needle ink to color the veins going down the center.

I made the faux leather tag using Fimo Clay and will be doing a tutorial for Swirlydoos on how to make it.  It looks real doesn't it?


This is a photo I took while we were walking through the trail that connects our property to our neighbor's. I used a Florabella action on it in Photoshop to mute the leaves and make my DD stick out a little more. I kept thinking that this page needed a shot of color, so I took what was left of my card stock and cut the daisies using my Tattered Florals die.  I misted the paper with Lilac Glimmer mist and then added some Dusty Concord distress ink.  I wanted the centers of the flowers to match the beaded centers of the Petaloo flowers.  I added a bead of glue to the center and then lightly dropped some little white beads onto it.  I didn't want to change the shape of the glue so I had to go slow.

I LOVE the cameos that came in the kit.  I think I have added one to nearly every page I made. 


This is my take on this month's sketch.  Once again, it took on a life of it's own.  I broke down and bought a Silhouette.  Overstock was having an amazing sale and it really was just too good to pass up.  While browsing their download store I came across these tags and knew I had to find a way to use them.  Of course I had to make them huge to fit my photos, but I really like them.  You guessed it, more photos from the Outer Banks. This was the first time she had seen the ocean up close and personal and you can tell by the look on her face that she thoroughly enjoyed it.


Chipboard Palooza starts today at Swirlydoos.  It is a fabulous contest!!!!!  Hop on over and join us.  


Thanks so much for taking the time to stop by.  I appreciate it more than you know.
XO,
Lisa

Saturday, December 11, 2010

Rejoice


This is another page I made using my December kit from Swirlydoos.  What a gorgeous kit.  I made this page for Angelica's Butterfly Challenge.

 I was racking my brain over what I was going to do for Christmas photos this year.  It's funny how inspiration finds you in some of the weirdest of ways.  I was trying to put some things together for a page and I had purchased this lovely piece of Prima Jewelry from Swirlydoos store which was laying out on my desk.  My DD walks into the room and just puts it on her head like a head band and stuck a pose for me.  (She's too much!)  She started to laugh and I said "Wait a minute....that gives me an idea."  A Christmas picture was born.  *insert a choir of Angels singing*

I emailed my friend, Mandy, and asked her if she could work some of her Photoshop magic on a few of my pics.  Click here to see her awesome blog.  She has a link to her photography site too.  She emailed them back to me and they just took my breath away.  On this particular picture she added a fairy wing, a small blue butterfly and an overall ethereal glow to the photo.  Isn't it gorgeous?!  Wowie!!!  Props to Mandy!!  Thanks sweetie~

I used two of the papers from the kit.  I fussy cut the border out of the Creative Imaginations paper and placed it over the top of a paper from Bo Bunny.  I used my white Adirondack paint and with a small paint brush I highlighted the angels wings.  I had planned on using the Prima Jewelry that my DD wore in the picture in my page.  I think it is a nice touch.

I used some coordinating paper to make a small frame behind the photo and then wet distressed the circle behind it.  The Calla Lily and Crepe Paper Carnations were made by hand and if you click the name of each it will bring you to my tutorial so you can make them too! I've also started to keep a list of my tutorials in the left hand side bar of my blog. It is near the top.  The green holly came in the kit and I had the red ribbon in my stash.


The butterfly was provided my Lisa Gregory.  She provides a set of butterflies for each kit.  I added burgandy stickles to it and clipped off some berries from one of the sprays that came with the kit.

Thank you so much for stopping by.  I love your comments.  They always bring a smile to my face and a warmth to my heart.  Have a blessed holiday!!!  Hugs~

Saturday, October 23, 2010

All I want for Christmas...


All I want for Christmas is my two front teeth.....I've got you humming that tune don't I?!  This is a pic I took of my DD a few years ago while we were ice skating at the park.  I used the Winter Joy collection from Bo Bunny.  I won it in a contest over at Swirlydoos.  This paper is prettier in person, trust me!

I have used three different papers from the collection to make this page. I fussy cut the bottom page to fit the squiggly vertical lines in behind the flowers.  Then I used the backside from another paper to use for the circle and slid that behind as well.  I used mini pom-pom lace to trim out the circle.  It made me think of little snowballs.


I love Dusty Attic, don't you?  I painted the flourish frame in brown paint first, then I went over it in Old Paper Distress Crackle Paint.  When that dried I used some Vintage Photo Distress Ink and rubbed it into the cracks.  I really wanted to give this a vintage yet shimmery Christmas look, so I added some Diamond Dust glitter in a few places.  That apparently wasn't enough because then I added some pearls to dress it up a bit more. The stamp in the middle is by Clear Art Stamps.  I used Diamond Stickles to color Santa's beard and hair.  I also used some green Liquid Pearls to give the holly in his hair some color.


These little dots were a lot of fun to make.  One of the girls over at Swirlydoos, Bonnie, reminded me about this cute little technique.  She used glue, and I used Glossy Accents.  Here is how you do it:
  • Get out your handy non-stick craft mat
  • Take your Glossy Accents and make random sized dots and let them dry and harden, thoroughly
  • When you are sure that they are dry and hard, use your Alcohol Inks to give them color.  Put a few drops onto the mat and then using tweezers place the dots in the little puddles. You can use a Q-Tip and add some ink to the top if you think you need it.
  • Let it dry and that is IT!!!  Aren't they cute?!


I made the Poinsettias using an SVG file.  I cut them out using my Cricut and then ran them through my Cuttlebug and embossed them.  I then used some Dusty Concord and Faded Jeans Distress Ink to highlight the embossed areas on the flowers.  I used Liquid Pearls to place a dot on the ends of the mini flowers in the middle and added Diamond Dust to the edges.  I think Diamond Dust can sometimes look like ice and that was the look I was going for.  I threw a pearl in the middle to finish them off.

The butterfly I made using a stamp from Layers of Color.  I used black Archival Ink and stamped it on a piece of scrap from the Bo Bunny collection.  I cut it out and then went over it in purple Stickles.

I had a lot of fun making this page and I hope that you have found something that inspires you!!!  TFL!!