Saturday, August 28, 2010
Faux Metal Tutorial
This was so much fun!!! My page titled The Journey (above this tut) features this faux metal. Here are the supplies you'll need:
Foil Tape (you will find this at any hardware store)
Any color card stock
Adirondack Alcohol Ink - Slate (I forgot to put it in the picture...my bad)
Adirondack Paint Dabber - Pitch Black
Cuttlebug
Sizzix - Tim Holtz Alterations Embossing Folder - Damask & Regal Flourish
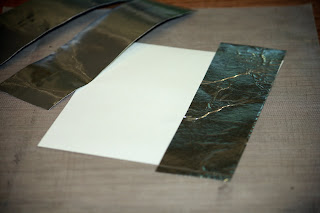
The first thing you need to do is cut your card stock to fit the embossing folder. Then cut (in my case) 3 strips of foil tape and cover the card stock.
Once you get it covered, turn it over and fold over the ends the tape so that you have clean edges.
Next, take your alcohol ink and dab it onto the tape and cover it. I had to do two coats in order to get the depth of color I was looking for.
Now you will need to place this in your embossing folder and run it through your Cuttlebug.
As you can see, I needed to cut off the excess paper. This is what it looks like after it comes out of the Cuttlebug. You can't really see the Slate colored ink but trust me, it's there.
Lastly, take a paper towel and Pitch Black Paint Dabber. Apply the paint to the paper towel and blot it all over the paper. I wanted the paint to go into the cracks and crevices in a few places so I dabbed a little extra paint in those places. You will notice that the faux metal will bend and crease just like the sheet of metal you can buy so keep this in mind when you work with it.
You're done! I hope you have as much fun making this as I did.
Labels:
photo tutorial
Subscribe to:
Post Comments (Atom)


8 comments:
Thank you so much for the tutorial!!!! I love the look!!!!
Way Cool Lisa!!!
Awesome tut!!!
Too cool!! Thanks for posting this neat idea....
Just wanted to let you know I love your layouts and all the ideas you share. Thank you.
Love the tut!! What a great look - I can't wait to try it :)
I just tried it...it's great!!!!!
Thanks for the tutorial!!!
Beautiful! I know my husband has that tape in his workshop...off I go to grab some, he'll never know :) Great tut and TFS.
Post a Comment