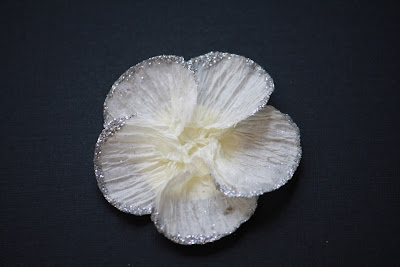
How much do I love thee? Let me count the ways!! Isn't this flower adorable!? I ran across this tutorial on the web months ago and it has been rolling around my head ever since. It is so versatile making it perfect for every one one of your gorgeous creations. Let's go!
- Crepe Paper - I wouldn't suggest the rolls of crepe paper that you buy for parties because it is much too thin. You can use it. I tried it and wasn't as satisfied with it. They were still cute and will work in a pinch. The difference in weight and stiffness makes a huge difference with this flower. I bought my crepe paper from Paper Whimsy. This site has awesome downloadable files too!
- Two circle punches - a 1 inch and a 3/4 inch
- Glitter and glitter tray
- Matte Medium
- Fast drying liquid glue
- Tweezers
- Pearls for the flower center - I bought a string of pearls in the jewelry department at Michael's. You can pick up some nice stuff when there is a sale or by using one of their coupons.
Cut out 5 of each size circle with your punches. Just a side note, sharpen your punches first. Crepe paper is spongy and your punches may not cut all the way through. My punches are not a great quality so they struggled a bit. You also need to cut out a 1 inch circle out of card stock. This is the base that you will glue your petals to.
Make sure that all of your circles are placed so that the creases are vertical (going up and down). There is a reason for this and it will be explained in the next step. Using a small amount of liquid glue on the petal, pinch the bottom so that it looks like a fan (see above). Do this to all of your petals.
No, you aren't seeing double. LOL Once you have glued all of your petals, go back to each one and pull at the creases of the paper making the petals fan out.
Place some glue on the card stock circle. Begin to place the large petals around the circle. Tuck one side of your petal underneath the petal before it.
Repeat the step above only this time using the small petals. I placed a dollop of glue in the middle and used my tweezers to help me place them and push down in the middle. You want to offset your petals, and will need to layer them the same way you did the larger ones. I like my flowers to have a little depth to them so I made sure to squish down the little petals making them pop up a little. The last step is to glue a pearl in the center. When everything dries you can play with the petals to "fluff" them up a little.
You can use whatever color crepe paper you want for these. You can use glass beads in place of glitter, or don't use any at all and use ink around the edges. You can use a smaller flower for the center, glass beads or whatever strikes your fancy. Really simple, totally customizable, and versatile. What else would you want from a flower!! Enjoy~


3 comments:
Gorgeous flowers Lisa!! Thanks for such an awesome tutorial!! :) hugs... Tracy
I have just found your blog and I'm so glad, it's fabulous. Thank you so much for sharing your flower making etc. I'm inspired and fairly new to following blogs and hand making my own embellishment so thanks heaps.
Wow these are awesome, thanks so much for sharing!!
Post a Comment