Home Photo Tutorials Video Tutorials Gallery Creative Resume Permissions Email Me

Faux Metal Tutorial

This was so much fun!!! My page titled The Journey (above this tut) features this faux metal. Here are the supplies you'll need...

Read More

Crepe Paper Carnations

How much do I love thee? Let me count the ways!! Isn't this flower adorable!? I ran across this tutorial on the web months ago and it has been rolling around my head ever since. It is so versatile making it perfect for every one one of your gorgeous creations. Let's go!

Read More

Calla Lily

I fell in love with this flower when I saw a video for it on the Heartfelt Creations website. So, if you don't want to read my tutorial you can click here to watch it over at HC. I did distress this up a little bit, which is not on the video. All right! Let's get started......

Read More

Faux Leather Tutorial

Making faux leather is easier than you think. I know, I say that about a lot of my tutorials. Have I been wrong? LOL...

Read More

Snowy Poinsettia

These flowers are just too cute! They are beyond easy to make too...BONUS!

Read More

Emerging Color Stamping Technique

Ok, I'll admit it...I really love stamping and the more I stamp the more I want to stamp. It's a wonderfully vicious circle. Emerging Color is one of those techniques that have some very basic and constant elements to it, but the creative license is all yours in how you present it. I'm sure if you Google or YouTube you will find a ton of tutorials and a lot of them will be very similar. Emerging Color boils down to this one word: resist. This is at its very core a resist technique. The whole trick to doing this is to remember that you will work in layers.

Read More


Showing posts with label Prima. Show all posts

Thursday, January 12, 2012

Swirlydoos January Kit Reveal and Blog Hop

Happy New Year and Welcome to Swirlydoos January Kit Reveal Blog Hop BLOCK PARTY!!! 

If you came here from Petaloo's blog, then you are on the right track.  If not, go back to Swirlydoos' blog and start from there.  We have some amazing projects for you to see today and as a bonus we have 4 manufacturer blogs that are joining in the fun!! There are 5 prize packs up for grabs so make sure to follow along and have fun!!?

Introducing, Mystical Winter. 

I based this page on the sketch that came with the kit.  The photo is one I took during our Halloween photo shoot at camp.  I brought it into Photoshop and applied an MCP action to it.  I really LOVE how it looks IRL.  The other two photos I found by searching for copyright free winter images on Bing.

I added this piece of Dusty Attic from my stash.  Between all of the add-on kits, we received 3 bottles of Tattered Angels mist.  I used two of them on this frame and then roughed up the inside edges with my rasp tool.  I stamped off the edge on the one side and then used bronze embossing powder around the outside edges.  I added gesso to the Petaloo Berry Branch to give it a wintery look.  I also misted, then heat embossed with silver, the Prima Roses.


This is a photo of my little Wonderland Cutie when she was just 2 years old. Awww.  This page is the beginning of my Hide & Peek Series over at Swirlydoos!

I used my Tattered Florals and Leaves die to create these whimsical blooms and leaves. I used some of the bling from our Bling Me Baby kit to dress up my blooms.  We received a strand of pom-pom string (I don't know how else to describe it LOL) and I decided to cut it into pieces and add it to my flower cluster.


I used a chipboard shape from a mini book as a template for my card stock. I dry embossed it, then heat embossed it with bronze in some places and finally used some gold ink to highlight other areas.  I punched 2 holes along the edge and then threaded ribbon through it.  Notice the metal photo corner there on the edge.  Wellll, pull it toward you and this is what you get.....


Sometimes I have a series of photos that were taken at the same time and I may not want them to be front and center, but I still like them.  Soooooo, I decided to make a mini book on my page.  Close it back up and no one knows!  Hide and Peek!


I am hosting this month's SwirlyHues Blog Challenge at Swirlydoos.  This is my example page for our color challenge.  This is my kiddo at her 5th birthday party.  That was 5 years ago this month.  *sniff...someone please pass a tissue* We went to a Nature Preserve which is literally a stone's throw away from home.  It was so cold that day.  The camp counselor walked the kids down to a frozen beaver damn.  It was beautiful; frozen in time and all glittery in the sun.  The counselor showed the kids what the logs look like when the beavers chew them and then showed the kids how they could do it too.....on pretzel sticks!  LOL  It was really cute.


I made this flower, and the two other blue ones, using the stamp set that came in our kit!


 I used bling from our Bling Me add on to embellish this piece of Dusty Attic.  I also used two different embossing powders on it.  The large white snowflake was made using the stamp set from the main kit and gesso that came in our technique kit! Voila! 


You have until midnight, eastern time, on January 15th to complete the hop. In order to qualify to win here is what you need to do:
1: Visit all of the blogs and leave a comment on each. This way we know you were there. Become a follower if you're not already. Take your time. There are beautiful things to see along the way.
2: Before you leave each blog, look for the “special” words and write it down.
Once you have visited all the blogs and collected all the special words, they will create a sentence.
3: Finally, go back here to the Swirlydoos blog and leave a comment letting us know how much fun you had AND tell us the sentence that was created with all of the special words you collected.

My special word is : "they"

THANK YOU SOOOOO MUCH FOR VISITING ME TODAY!!!! XOXOXO, Lisa

The party continues over at Prima's blog.  Have fun!

Friday, August 5, 2011

Swirlydoos August Kit Reveal and Blog Hop!

Welcome to Swirlydoos August Kit Reveal Blog Hop!!!

If you've arrived here from Angelica's blog, then you are on the right track! If you are one of my regular followers then head on over to the Swirlydoos Blog and join in the fun! 

Welcome to Poetry en Prose.  This month's kit from Swirlydoos is so full of rich colors.  I love the paper which is from KaiserCraft.  

I had a lot of fun making this page.  A fellow teacher at Miss Arts, Stacey Cohen, taught a class on creating a really cool shadow box.  This is my attempt at creating the shadow box.  I love the dimension and all of the nooks and crannies that lend themselves to having little treasures tucked in all over.  The flowers in the month's add on include Petaloo and Prima.  I had fun embellishing the Dusty Attic Birdcage too!


Those of you the know me and my DD, know that she loves riding the flying swings and I love capturing her pure joy on film every time she comes 'round.  There is something about a carnival that brings up so many great memories; the music, the smells and the kids all laughing and screaming.  Good stuff!  I absolutely love it when a kit not only gives me insanely gorgeous paper, but when I am also given colors that contrast and POP!  Check out those little blue flowers!  AWESOME!


The Technique kit add on was full of resist papers and some fun and funky mist called Inchworm!  LOL  It is that really cool green on the tag.  You have to get some.  Seriously.


This is for the monthly kit sketch that is provided for each month's kit.  I have to be honest here, this is my 2nd attempt at the sketch.  At first I was so inspired by the idea of slicing up a photo and then when it came time to do it...well, nothing was playing along with me.  LOL  I used some of the resist paper that came in our Technique kit.  This is a picture of my DD when we went to visit Boldt Castle last year.  She was sitting on a massive stone bench on the even more massive veranda at the castle.  I found that the picture seemed to get lost by being all sliced up so I added a rhinestone circle to bring attention back to the photo.  She had so much fun exploring the castle that day.
I changed things up a bit with this month's canvas.  My DD wanted me to make one for her so she had a lot of input in creating this.  We designed the dress and she really wanted that Dusty Attic scroll at the top.  She wanted a ponytail...and on and on.  LOL  I had a little trouble with perspective on this, but it's not supposed to be perfect right?!  The dress and the fussy cut flowers came from the kit papers.


REMEMBER, to qualify for the grand prize you need to:
1) visit all of the blogs, including Swirlydoos, in order to qualify.
2) Be sure to leave a comment and become a follower of each blog (if you haven't already). This way we know that you have joined in the party
!

You have through 5pm Eastern time on Sunday August 7th to complete the hop!! All entries will be entered into the drawing for our Grand Prize!!! This month's prize is this completely gorgeous kit made up of Bo Bunny product!!


Now head on over to Camilla's blog where you will see some more beautiful projects made with this month’s kit, Poetry en Prose.  Winner will be announced on the Swirlydoos blog on August 8th. Good luck and thank you for joining us!!

XO, Lisa

Thursday, May 5, 2011

Grandma's Garden - Swirlydoos May Kit

This month's kit from Swirlydoos is full of vintage summer memories. The paper features Glitz's Laced with Grace, K and Co., and Crafter's Workshop.  The main kit and the add-on kits were jam packed with so many luscious bits; too many to list here.  You must go over to Swirydoos and check out the entire list of goodies.

This page makes me think of lemonade.  Not sure why, but it does.  I used a Florabella action on my photo of my daughter at the lake a few years ago.  I love the warm vintage look of it.  I'm not a huge fan of plaid paper, but when I paired this up with the floral print and the coordinating card stock I immediately fell in love.  It reminds me of Grandma's.  The design is based on a sketch by Suepup for Let's Capture Our Memories.

This month's Technique Kit Add On included Petaloo's Color Me Crazy Frames.  If you haven't tried these yet, you really need to.  They are so cool.  They come out of the package white in color and with a paper towel kind of texture.  I took one of my favorite verse stamps and used Memento Coffee Bean ink. Then, I misted the frame with yellow glimmer mist and then using Espresso Bean I misted just a few places to add a little bit of warmth to it.  I hugged the frame with a carnation vine from Prima, that gorgeous big Rose, and a shot of Spice colored Petaloo.

This gorgeous big Dusty Attic bird cage was in our kit too.  I could spend days dressing up chippies.  I misted the stand in Espresso Bean and painted the cage in a base coat of white paint.  I misted it with yellow and then I used one of the  awesome Tattered Angels stamps that came in the main kit and added a lace accent to the bottom.  I cut out a piece of coordinating paper to put behind the cage.  I used lemon yellow Liquid Pearls as accents, added some bling and wove ribbon from the kit in between the bars.
This page, to me, screams of  a hot summer day in the country.  Can't you hear the cicadas and smell honeysuckle on the breeze? I used a Prima mask in the corners and Olive Glimmer Mist.  Look at those Darjeeling flowers from Petaloo!  They are so pretty and paired with those sunflowers...well, all I can say is that they really speak of summer.


I once again used Petaloo's Color Me Crazy frames.  I applied Vintage Photo Distress Ink to the smaller frame directly from the pad and then misted it with water and let it dry.  I misted the outer frame in yellow, olive and espresso bean.  I attached the two frames and used one of the Inkadinkadoo stamps that came in the kit and embossed the corners.


This page is for the monthly sketch that Beggahuna does for each of our kits.  It is a gorgeous sketch but there is soooooo much white space!  I have some bizarre fear of white space.  I try to do white space pages, but I can't seem to keep myself from adding things LOL.  I flipped the sketch upside down and decided rather than using 3 individual photos that I would use one photo and crop it in a few different ways.

We had another Dusty Attic bird cage in our kit and for this one I misted it with Olive Glimmer Mist and then using a paint brush I hit a few spots with  Rustic Glimmer Glam to give the look of rusted metal.  I custom cut some paper to go behind it and added some bling.  


The heart is from the Petaloo Color Me Crazy frames pack.  Don't they look like tumbled stone?  I wrote a tutorial for Swirlydoos, so head on over and check it out!
I used the same technique on the frame that I used on the hearts.

I was going for a brick wall look with this.  I think I kind of pulled it off.  It looked really good before I covered it LOL!  I used my brand new Zutter Distrezzer for the bricks.  I once again used the Glimmer Mist that came with Technique Kit and misted my bricks.  The tag is from the same pack of Petaloo's Color Me Crazy Frames.  I used the stamps and mists that came in the kit to dress it up a bit.  I really love the contrast of colors on this page.


Thanks so much for stopping by and checking out my May projects.  


XO, Lisa

Tuesday, April 19, 2011

Swirlydoos DT Challenge

We had our first ever Design Team challenge at Swirlydoos.  The subscribers came up with the challenge idea!!  We had to scrap a photo from another DT's family.  We also had to use the photo a minimum of two times AND the photo had to be altered.  To add to the twist, the photos of the finished lay outs were posted to our members but they weren't told who did what page.  Did you follow that?!  LOL


I had the pleasure of scrapping one of Robin's granddaughters.  Isn't she pretty?!  I was sooooooo nervous to scrap this.  I mean, come on....this is ROBIN we are talking about.  She's a flippin' legend!  I decided to run the photo through a Florabella action in PSE and then print an 8x10 on a transparency.  Robin uses transparencies a lot and I did this as a tribute to her style.

I used paper from Prima's Fairy Flora collection (love love love this paper).  I decided to tear one page back, kind of opening the page.  I used some of my favorite stamps and stamped on and off the photo.

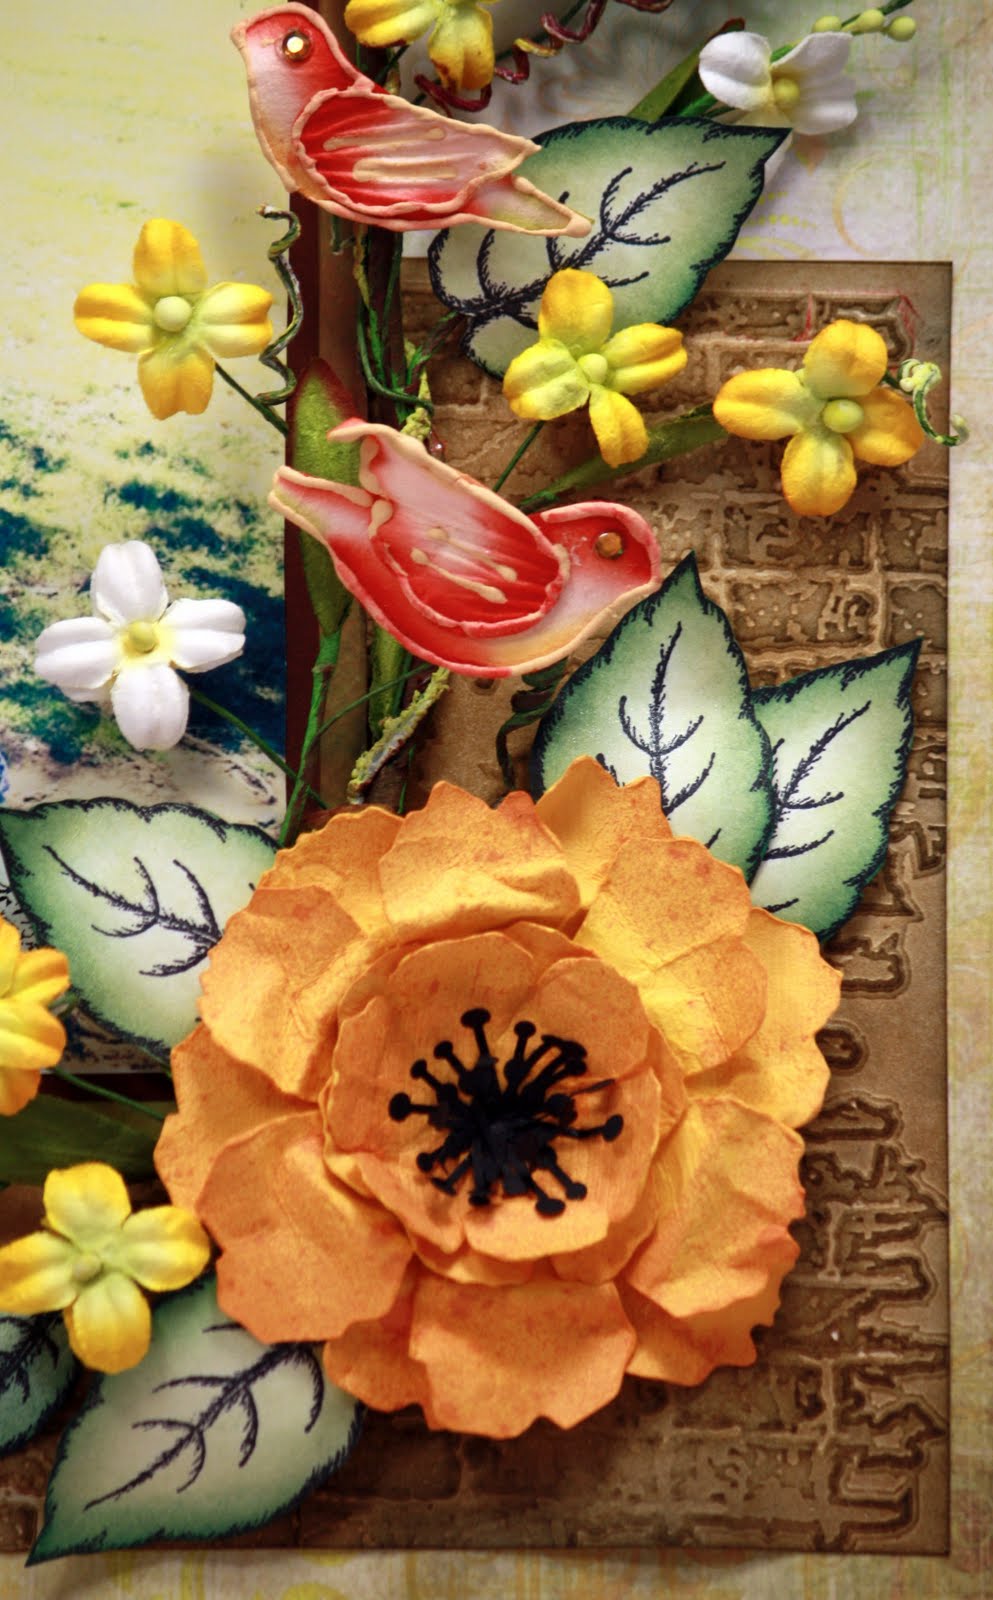
I love this branch from Prima.  The little yellow flowers and birds are so cute.  I made the orange flower using a Sizzix Tattered Florals die and yellow card stock.  I then misted the card stock with Tiger Lily Glimmer Mist.  I love the broken brick wall embossing folder I have and decided to add that to the page as well.  I was trying to get a vintage, groovy, urban, girlie feel to this.  LOL  I'm not sure that I pulled it off, but I had fun trying.


Thanks so much Robin for letting me scrap your beautiful granddaughter, and congratulations to you for winning the challenge!!!!!  


Thanks for stopping by!!  
XO,
Lisa

Friday, April 15, 2011

Week 2 Round Robin

It's reveal day for week 2 of the Round Robin Challenge at Swirlydoos.  Pat created week 1's page that I had to lift.  I was really inspired by the elements that she used on her page; she used ribbon lacing, punch work and a small cluster of 2 items around her photo.  Her photo was of an artisian spring on her property.  Well, I made sure to include those elements on my page, but I completely changed where they ended up on the page.  Sometimes I just start working on a page and it has a way of taking on a life of its own, and this was one of those times.  I used up the final full sheets of paper from our April Kit.  These papers are from Bo Bunny's Gabrielle Line.....it is really, really nice paper.....*hint hint*
This is a picture of my DD when she was 4.  We have a brook on our property and it runs right next to our house. Our patio goes right up next to it.  She was playing in the water and as you can see, the mud too.  She looked so cute with that little stripe of mud under her eye.

I have always wanted to try ribbon lacing and got so excited when I saw Pat's page.  I really wanted the lacing to be functional on my page and immediately pictured the paper being folded back as if it weren't laced all the way; giving the illusion that the rest of my page was in a pocket of sorts.  I used all of my eyelets on this page but I really like the way they set off the lacing. 

Pat had a second photo on her page.  I took a photo of some tulips that were in bloom in my yard and sandwiched it in between a bird and a small tag.


I decided to use this gorgeous Dusty Attic frame for my photo rather than matting it.  I painted it white and then using a fan paint brush and Stream Alcohol ink, I created the striations along the length of the chipboard.  I went over it with a light coat of glossy accents and then embellished it with pearls.


Thanks so much for stopping by!!!!
Have a great day and Happy Spring!


XO,
Lisa

Tuesday, April 5, 2011

Swirlydoos Reveal - Bella Volo

Each month I am forever amazed by our kits at Swirlydoos.  Krissy knows how to treat us right; from the Main Kit right through each Add-On Kit, they build on one another until you end up with EVERYTHING you could possibly need to create some outstanding pages.  This month's kit features Bo Bunny's gorgeous Gabrielle line, flowers from Petaloo and Prima, Dusty Attic, bling, metal embellies, glitter and Smooch OH MY!!!!!

This is a photo of my DD and DH while we were at the Outer Banks a few years ago.  I've been wanting to scrap this for a while.  I created the book cover using the card stock we received. I used the small Prima stamp with text on it that came in the kit along with another small stamp by Prima that has branches on it. I then distressed the cover and finished it off with Vintage Photo ink.  The edge around the window has some Vintage Photo ink and Distress Embossing Powder.  I inked the Dusty Attic hinges and then used a glue pad and the small Prima text stamp.  Then I dusted some gold Perfect Pearls over the stamped image and finished them off with Liquid Pearls that, you guessed it....came in the kit!  I painted the thickers white and then dusted them with the white Fairy Dust Glitter we received.  


This is another photo I took while we were at the beach in the Outer Banks.  My DD was spinning, twirling and dancing as the waves were coming up onto the sand.  I made the flowers out of the card stock and a stamp from Heartfelt Creations.  I used the coordinating Spellbinders Die set and cut them out.  I inked them up a little more and then edged them in Fairy Dust glitter.  Those little Petaloo flowers fit just perfectly with them. 
Our Technique Kit this month is called Chipboard Palooza and not only does it include some gorgeous Dust Attic, but it also includes a white Adirondack Paint Dabber, Copper Alcohol Ink, Smooch Paint, Glitter and lots of little pearls.  

I painted the Dusty Attic gate with the white paint.  Then I went over some areas with the Copper AI, and a few other places using the green Smooch paint.  I finished it off by adding some Distress Embossing powder. A very cool thing happens when you emboss over paint; the heat makes the paint bubble and in the places where your embossing is sparse the paint will actually come to the surface and give you this really cool oxidized appearance.  I decided to embellish it  further by taking apart a cameo broach that came in the kit, and used the pearls and one of the jewels. I embossed a transparency with Ranger Bridal Embossing Tinsel and placed it behind the gate.


This is such a fun photo.  I remember the day I took it.  They don't look like they are up to anything do they? Right......... This is my DD and her cousin.  This paper is the perfect fit for outdoor photos.  I decided to use the same flower stamp and die I used on the page above, but made the flowers a bit more simple.  I inked them up a bit with some Broken China and also painted them using a Magical Mica that we got in the Embellishment Add-On.  Aren't the leaves awesome!  This is another stamp from Heartfelt Creations and again, there is a matching die.  After I stamped and cut them out, I sprayed them with some green Glimmer Mist and crumbled them up while they were still wet.  I hit the wrinkles with Pine Needle distress ink and then edged them using Vintage Photo.  I used a Fantastix and Pine Needle ink to color the veins going down the center.

I made the faux leather tag using Fimo Clay and will be doing a tutorial for Swirlydoos on how to make it.  It looks real doesn't it?


This is a photo I took while we were walking through the trail that connects our property to our neighbor's. I used a Florabella action on it in Photoshop to mute the leaves and make my DD stick out a little more. I kept thinking that this page needed a shot of color, so I took what was left of my card stock and cut the daisies using my Tattered Florals die.  I misted the paper with Lilac Glimmer mist and then added some Dusty Concord distress ink.  I wanted the centers of the flowers to match the beaded centers of the Petaloo flowers.  I added a bead of glue to the center and then lightly dropped some little white beads onto it.  I didn't want to change the shape of the glue so I had to go slow.

I LOVE the cameos that came in the kit.  I think I have added one to nearly every page I made. 


This is my take on this month's sketch.  Once again, it took on a life of it's own.  I broke down and bought a Silhouette.  Overstock was having an amazing sale and it really was just too good to pass up.  While browsing their download store I came across these tags and knew I had to find a way to use them.  Of course I had to make them huge to fit my photos, but I really like them.  You guessed it, more photos from the Outer Banks. This was the first time she had seen the ocean up close and personal and you can tell by the look on her face that she thoroughly enjoyed it.


Chipboard Palooza starts today at Swirlydoos.  It is a fabulous contest!!!!!  Hop on over and join us.  


Thanks so much for taking the time to stop by.  I appreciate it more than you know.
XO,
Lisa

Monday, March 14, 2011

Round Robin Challenge - Week 2


Week 2 for the Round Robin Challenge over at Swirlydoos.  This is a photo of my DD and our puppy Zeke.  He was just about a year and a half old in this pic.  Zeke is a mix of German Shepard, Black Lab and Rottie.  He is a big boy and such a sweetheart.  He has to be with his peeps!!!  He also loves water and took this chance to follow his girl out into the river where we were camping to swim with her.  

I had the difficult job of lifting a page created by Christy.  She sewed on her page and I thought oh no....I have yet to sew on a page!  Can you believe it?  Well, it's true; I haven't!  I used to make quilts so I can't for the life of me figure out why I have waited so long to give this a try.   I dusted off my big machine, got some scrap paper and went for it.  Can I just tell you that my machine went through the paper like it was melted buttah (said using my best Godfather imitation).  Yay!!!!


I layered my paper and cut the little fleur de lis all around the edges because I wanted to use them like the brackets in a picture frame and slide my second paper underneath them.  After having done this I couldn't just sew around the edges so I made a template and drew a pattern to follow while sewing that would take me around to each point.

She also used leaves that had text on them.  I found some paper from the latest Technique Kit I got from Swirlydoos and and used a Spellbinders die from Heartfelt Creations to cut my leaves.  I also used a Martha Stewart Leaf punch for the smaller leaves.  I used a stylus to emboss veins on to them, crinkled them up and then inked them.  I added this really lovely carnation vine from Prima.  I so love the color of those flowers.  I took out my Sizzix Tattered Flowers die and cut some flowers out of yellow card stock.  Next I used some Tiger Lilly and Espresso Glimmer mist to make them more match the vine and added a pearl to the centers.


I ended up using 5 types of ribbon, trim and lace on page. 

Thanks so much for stopping by and if you get a chance hop on over to Swirlydoos and check out the rest of the pages in the Round Robin Challenge!!!  They are all "lift worthy".  

XO,
Lisa

P.S.  I will be posting a new tutorial and my latest altered object in the coming days.  Stay tuned!


Saturday, March 5, 2011

Swirlydoos Reveal Day - Cabaret


This month's kit from Swirlydoos is beyond gorgeous!  It is full of Prima's latest line of paper and flowers.  I had so much fun with this kit.  


I made this page by fussy cutting one piece of paper and laying it on top of another.  The embellishment add-on had this gorgeous foil paper that I just had to use.  I was inspired by the paper dresses I saw in all of the pictures from CHA and decided to make a paper doll.  She is pretty simple when you compare her to the CHA mannequins, but hey, I'm just getting started! LOL


I Googled drawings of can-can dancers and after what seemed to be 100 pages, I came across a drawing that I really like.  I printed it out and then used a piece of vellum, because I didn't have any tracing paper, and I traced the entire drawing.  Then I cut the pieces out and used them as a pattern.  Then, using the coordinating card stock and patterned paper from the kit, I cut out all of the pieces.  I used a verse stamp on her head, chest and arms.


Sketch Inspiration is a sketch blog and they are working with the DT at Swirlydoos this month.  They gave us a sketch and asked us to work with it.  This is my take on the sketch. I turned it over on its side.   The photo was taken a few years back while we were on vacation in the Outer Banks of North Carolina.  I painted a butterfly on my DD's face.  I used a Florabella action in Photoshop  on my photo.   Everything is from this month's kit.  I used a version of an Emerging Color technique on the strip going across the top.  I used a Spellbinder's die and the Smooch spray from out kit to make the butterflies and to mist my page in a few places.  The sketch called for a rectangular object.  I decided to make an envelope instead.


This is my take on the Swirlydoos Sketch that came with our kit.  I flipped it and kind of dismantled it.  It is a beautiful sketch, but it took on a life of its own. Everything except the UTEE is from this month's kit.  I made a heart shape using UTEE and a butterfly that Lisa G. made available for the kit.  I also made a mold of a frame corner I have and then poured bronze UTEE into it.  That is how I made the photo corner. The edge of the page has been slightly cut off, but you can see a close up of the photo corner below.


This page came into being because of a canvas I saw that inspired me.  The canvas had a piece of fabric on it that had been made to look like a big curtain that had been pulled back.  I decided to give it a try.  I'm still working on perfecting this, but the way I look at it; nothing ventured is nothing gained!  All of this was made using the kit as well.

Thank you so much for stopping by today!!  

Hugs,
Lisa