Happy Halloween Bloggers!!!!
Scrapbook News and Review's next issue is set to debut today! In this post I've included a few projects that will be in this new issue from two other incredibly talented staffers!!!
This is my Wonderland Box. It is only the second altered box I've ever done and I had a great time making this. Who doesn't love the Halloween in Wonderland paper from Graphic 45?! So whimsical and rich in color. It really wasn't all that hard. All you have to do is 1) find a box, 2) paint the box, and 3) embellish. That's it! Ok, I did lightly sand the box and cover it in gesso first, and ink, paint and mist the embellies, but that's it! I promise!!! LOL
I went through Micheal's and found this cute little bat and that medallion was on sale in the jewelry section. I thought that the Dusty Attic iron gate and tree branch went really well with the paper.
This is my DD's eye that I cut out of another photo. Don't stare at it for too long because it is enchanted and you will be hypnotized into thinking you are Sister Maria in The Sound of Music and you will go skipping through your neighborhood twirling and singing!!! ......Ask me how I know.... LOL!! It fit perfectly inside the Tim Holtz Metal Frame Plate. I glued it to the back and then filled it in with Glossy Accents.
Aren't those metal corners awesome!!!! They are really heavy and just beautiful in real life.
This is the inside of the box and you are looking at the top. The paper is yummy. It is flocked and feels all velvety. I added a small mirror I also found in the jewelry isle.
This is the inside, bottom of the box. I carried the flocked paper down to the bottom as well. Since I am one of those people who doesn't like to have trinkety things just hanging around the house UNLESS they have a purpose, I decided to make this box "work" during Halloween.

I took the playing cards that came in the paper stack and made them sturdy by gluing a thin piece of cardboard to them and then glued black card stock to the back of that. As you can see, I took some Halloween ATC cards and glued them on the back. We are also using these cards for our favorite Halloween recipes as well as recipe cards for potions and spells!!! Mwah-ah-ah!!!!! My DD and I went foraging through the woods and took pine cones and pulled the "scales" off of the open pine cones. We put them in a small velvet bag and these are now "Dragon Scales" to be used in one of the fake potions. We also made unicorn horns out of baking clay, but they seemed to have disappeared....hmmmmm. Anyway, this is now a really fun Halloween box that pulls double duty and holds all kinds of treasures inside!!!!
NOW, for the Scrapbook News and Review Sneak Peak......drum roll.........
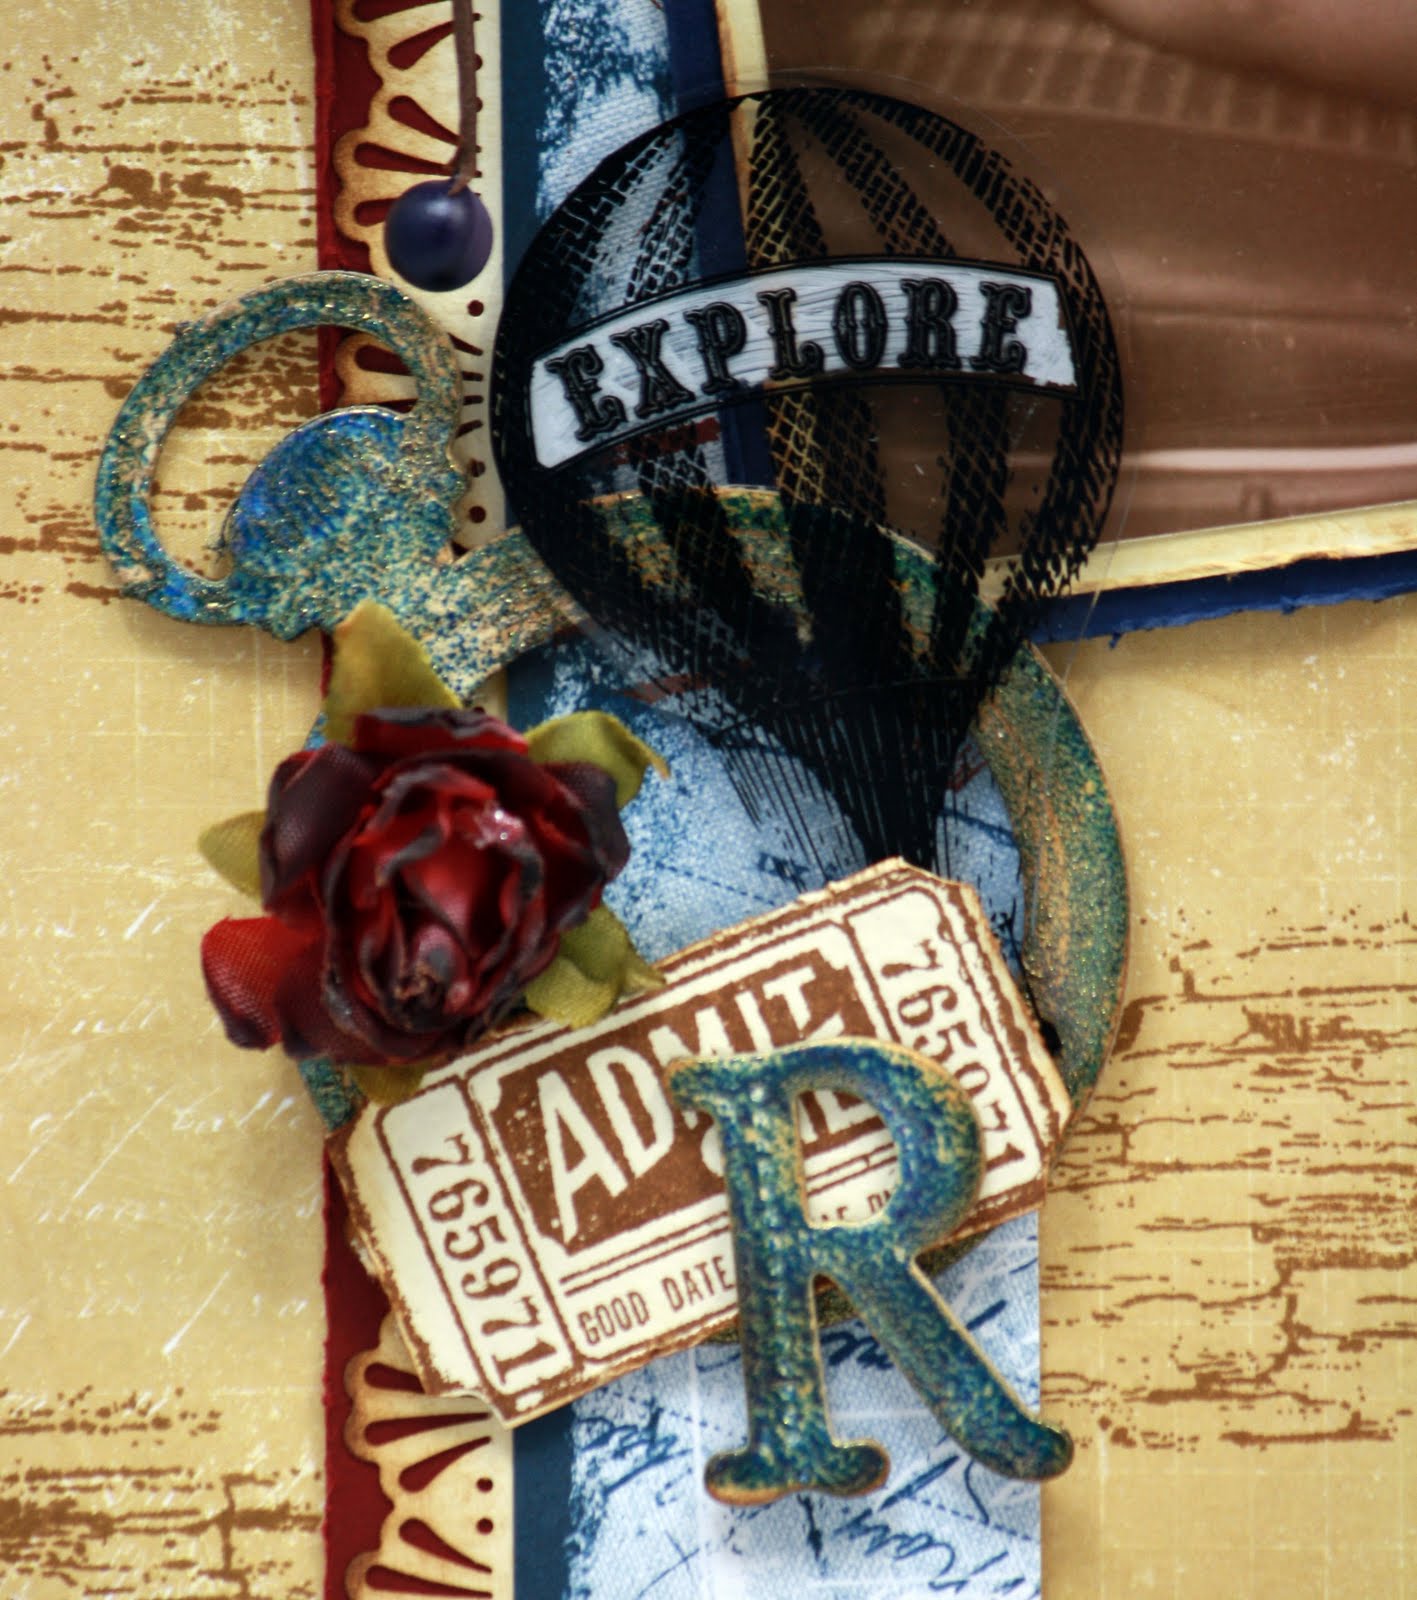
This is a layout of a very dear friend, Mandy Harrell. I love her to pieces and her work is nothing short of inspiring. I am forever stalking her blog and her work and pouring over them inch by inch. If I could just get inside her head, I would be rich indeed!!! Here is a page that she submitted in the Masks and Stencils section of the magazine. She does Steampunk like no one else!!! Girlfriend has it going on. Isn't it gorgeous?!
I love the Mixed Media section and I am such a fan of the staffers in this area. They inspire me so much!!! I've actually decided to jump in this area and learn and play. They are so generous with their skills and talents. Check out these little inchies from another incredibly talented staffer, Heidi Myers. Aren't they awesome??!!!


 I
I


